 Muv Wheelchair
Muv Wheelchair
Muv Wheelchair
Making a home wheelchair accessible is not simply about adding a ramp. It means understanding how someone moves, turns, reaches, rests, and feels inside the space. This 2026 guide explains how to make a home wheelchair accessible through practical planning, safer layouts, and realistic improvements.
Ron Mace, an architect and founder of the universal design movement, described universal design as “the design of products and environments to be usable by all people, to the greatest extent possible.” His principle remains highly relevant. A wide entrance, a level threshold, and clear floor space can support wheelchair users, older adults, children, and visitors carrying heavy items.
Look closely at daily routines. Can a wheelchair turn beside the bed? Can the user reach light switches without stretching? Does the bathroom provide enough room for transfers? Small details matter. A loose rug may stop a wheelchair suddenly. A narrow hallway may make one room practically unusable. These problems are easy to overlook during a quick inspection.
Professional advice can improve safety, especially for bathroom changes, structural work, and ramp gradients. However, every home and wheelchair is different. A plan that works in a new apartment may fail in an older house. That part deserves honest reflection.
The following sections examine entrances, doorways, kitchens, bathrooms, bedrooms, flooring, lighting, and emergency access. They also discuss budget-friendly adjustments before expensive remodeling begins. Accessibility should feel usable every day, not merely compliant on paper. The best result is a home that supports independence, dignity, and ordinary living.
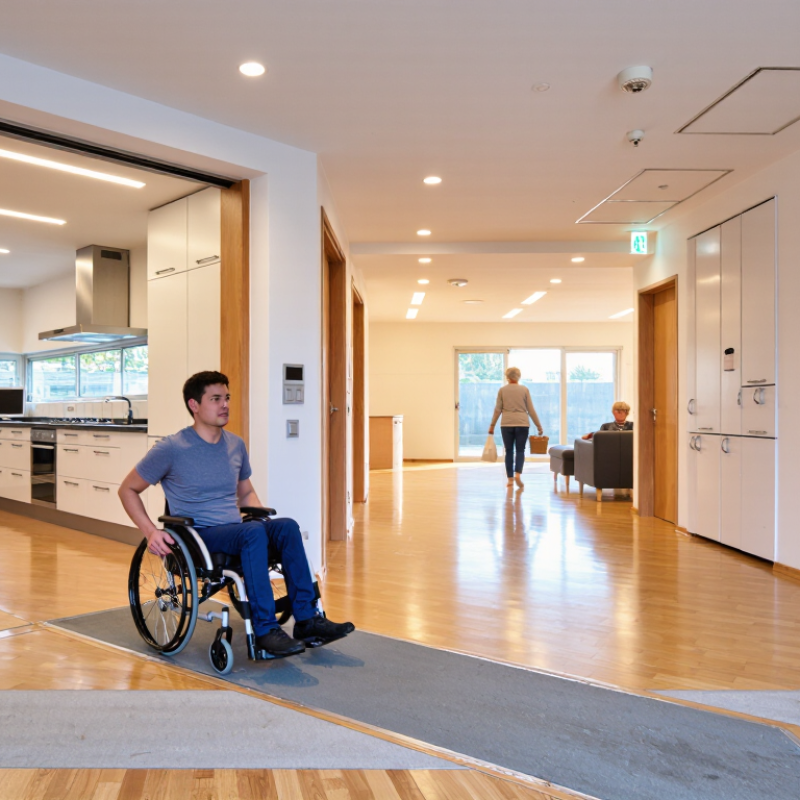
Making a home wheelchair accessible in 2026 starts with measuring, not guessing. The ADA 2010 Standards specify at least 32 inches of clear doorway width. Measure with the door open 90 degrees. Trim, hinges, and thick doors can quietly reduce usable space. ADA rules target public facilities, yet they offer a valuable residential benchmark. A private home still needs practical judgment.
Map every route from the entrance to the bedroom, bathroom, and kitchen. A 60-inch turning circle allows many wheelchairs to rotate without repeated backing. Measure at floor level, where baseboards, radiators, and furniture steal clearance. Mark the circle with painter’s tape.
Then test the route with the actual wheelchair. It may fail. A paper plan can look perfect while a footrest catches a cabinet.
These dimensions matter because demand is substantial. The AARP 2021 Home and Community Preferences Survey found that 77% of adults aged 50 and older want to remain at home. The U.S. Census Bureau’s 2022 American Community Survey reported disabilities among roughly one in seven Americans. Use these figures as planning context, not decoration. Record doorway widths, turning points, thresholds, and transfer positions. Ask the resident to perform ordinary tasks. Professional assessment remains wise, especially when walls or plumbing may move. Small errors become daily barriers.
Aim for at least 32 inches of clear width with the door open 90 degrees. Measure between the actual obstacles. Thick doors, hinges, and trim can reduce usable space.
Map the path from the entrance to the bedroom, bathroom, and kitchen. Check doorways, thresholds, furniture, and turning points. A paper plan may look perfect. Real movement can reveal problems.
A 60-inch turning circle supports many wheelchair users. Mark the circle with painter’s tape on the floor. Test it using the actual wheelchair, including footrests.
Keep at least 36 inches of clear width along the entire route. Measure the narrowest points, not only the walls. Radiators, open doors, handles, and shoe racks can reduce clearance.
Thick rugs, loose mats, and raised thresholds may catch small front wheels. Use firm, level flooring whenever possible. Secure every remaining edge. Small edges matter.
Keep at least one counter section no higher than 34 inches. Provide knee space below that work area. Allow about 30 inches of width near the sink, with clear floor space in front.
Test the faucet from a seated position before permanent installation. Lever handles often require less precise movement than small knobs. A pull-out sprayer may help, but its hose could catch on the chair.
Keep the route to the toilet and sink smooth, wide, and free of loose mats. Consider a wall-mounted sink for better knee room. Test the sink height, chair position, user reach, and door swing together.
Professional review is wise when walls, plumbing, or doorways may move. An occupational therapist or qualified building professional can identify overlooked barriers. I once assumed a wider passage solved everything. It did not.
Record doorway widths, hallway clearances, thresholds, turning points, and transfer positions. Ask the resident to perform ordinary tasks. Local requirements may differ, so verify them before construction.
Learning how to make a home wheelchair accessible begins with evaluating movement, reach, and transfer needs throughout the house. Start by checking that doorways provide at least 32 inches of clear width and that key rooms offer a 60-inch turning circle. Replace steps with step-free entrances, using ramps designed around a maximum slope of 1:12. Hallways should maintain a clear route of approximately 36 inches to support safer, more comfortable wheelchair movement.
Kitchens and bathrooms should be planned for independent use, including counters around 34 inches high and at least 30 inches of knee clearance beneath sinks where possible. Safety can be improved with securely installed grab bars, lever-style handles, and 30-by-48-inch transfer spaces beside toilets, showers, or other fixtures. Thoughtful layouts, smooth flooring, adequate lighting, and unobstructed paths can make everyday activities easier while allowing the home to remain practical, welcoming, and adaptable to changing mobility needs.
